> ## Documentation Index
> Fetch the complete documentation index at: https://docs.costgraph.ai/llms.txt
> Use this file to discover all available pages before exploring further.
# Overview
The CostGraph Agent is a daemon that runs on your virtual machines and continuously reports resource usage to CostGraph. It collects:
* **Host metrics** — CPU, memory, disk, and network utilization for the machine.
* **Container metrics and inventory** — when a Docker or containerd runtime is present.
These stream to CostGraph, where they power:
* **VM inventory and cost** — every host and its attached disks, with compute and storage cost attributed per VM, plus live utilization and status.
* **[Rightsizing recommendations](/costgraph/agent/recommendations)** — resize suggestions from observed CPU and memory usage, including cheaper instance types across cloud providers.
* **[Idle detection](/costgraph/agent/recommendations#idle-detection)** — VMs with consistently low CPU, memory, network, and disk activity are flagged to terminate.
* **Container and process insight** — per-container metrics and the top processes driving usage on each host.
* **Cost anomalies** — unusual spend or utilization changes surfaced automatically.
## Prerequisites
* A Linux host e.g Debian, Ubuntu, RHEL, Amazon Linux, Alpine etc (`amd64` or `arm64`).
* An API key from the [CostGraph platform](https://app.costgraph.ai/settings/account/api-keys).
## Installation
Pipe the installer to `sh` with your API key on the `sh` side of the pipe:
```bash theme={null}
curl -sSL https://setup.costgraph.ai/install.sh | COSTGRAPH_API_KEY="bl_..." sh
```
Or download, inspect, then run:
```bash theme={null}
curl -sSL https://setup.costgraph.ai/install.sh -o install.sh
chmod +x install.sh
COSTGRAPH_API_KEY="bl_..." ./install.sh
```
The installer detects your init system and registers the agent as a **systemd** or **OpenRC** service that starts on boot. It supports Debian, Ubuntu, RHEL, Amazon Linux, and Alpine, and installs the latest stable release by default. Your API key is stored in `/etc/default/costgraph-agent` (systemd) or `/etc/conf.d/costgraph-agent` (OpenRC).
Pin a specific release with `COSTGRAPH_AGENT_VERSION` — see the [changelog](/costgraph/agent/changelog) for available versions.
Manage the service the usual way:
```bash theme={null}
sudo systemctl status costgraph-agent
sudo journalctl -u costgraph-agent -f
```
The agent is published as a container image at `ghcr.io/baselinehq/costgraph-agent`.
```bash theme={null}
docker run -d --name costgraph-agent \
--restart unless-stopped \
--pid host \
--network host \
-v /proc:/host/proc:ro \
-v costgraph-agent-state:/var/lib/costgraph-agent \
-e COSTGRAPH_API_KEY="bl_..." \
ghcr.io/baselinehq/costgraph-agent:latest
```
* `--pid host` and `-v /proc:/host/proc:ro` give the agent visibility into host processes.
* `--network host` lets it reach the CostGraph backend and exposes its metrics on the host at port `9101`.
* The named volume persists the durable remote-write queue across restarts.
* To collect container inventory, also mount the runtime socket, for example `-v /var/run/docker.sock:/var/run/docker.sock:ro`.
```yaml theme={null}
services:
costgraph-agent:
image: ghcr.io/baselinehq/costgraph-agent:latest
container_name: costgraph-agent
restart: unless-stopped
pid: host
network_mode: host
environment:
- COSTGRAPH_API_KEY=bl_...
volumes:
- /proc:/host/proc:ro
- costgraph-agent-state:/var/lib/costgraph-agent
# Optional: container inventory
# - /var/run/docker.sock:/var/run/docker.sock:ro
volumes:
costgraph-agent-state:
```
```bash theme={null}
docker compose up -d
docker compose logs -f costgraph-agent
```
Roll the agent out across a fleet with the published Ansible collection.
```bash theme={null}
ansible-galaxy collection install \
https://downloads.costgraph.com/ansible/costgraph-agent-0.1.0.tar.gz
```
```yaml theme={null}
---
- name: Install CostGraph agent
hosts: all
become: true
roles:
- role: costgraph.agent.costgraph_agent
vars:
costgraph_api_key: "{{ lookup('env', 'COSTGRAPH_API_KEY') }}"
```
```bash theme={null}
export COSTGRAPH_API_KEY='bl_...'
ansible-playbook -i inventory.ini install-costgraph-agent.yml
```
The role installs the binary at `/usr/local/bin/costgraph-agent`, writes the API key to `/etc/default/costgraph-agent`, and manages the `costgraph-agent` systemd service.
Run the installer from a VM's first-boot `user_data`. Each instance installs the agent and registers itself on boot — so it works for launch templates, instance templates, and autoscaling groups with no manual step.
Use a `#cloud-config`, which works across most cloud images:
```yaml theme={null}
#cloud-config
runcmd:
- curl -sSL https://setup.costgraph.ai/install.sh -o /tmp/costgraph-install.sh
- COSTGRAPH_API_KEY="bl_..." sh /tmp/costgraph-install.sh
```
Or a plain script, for fields that take raw `user_data`:
```bash theme={null}
#!/bin/sh
curl -sSL https://setup.costgraph.ai/install.sh | COSTGRAPH_API_KEY="bl_..." sh
```
Where you paste it depends on the provider:
Add it under **User data** on the instance or launch template (EC2 console -> Advanced details -> User data, or `aws ec2 run-instances --user-data file://user-data.sh`). Instances launched from that template by an Auto Scaling group install the agent automatically.
Set it as the `startup-script` metadata key:
```bash theme={null}
gcloud compute instances create my-vm \
--metadata-from-file startup-script=user-data.sh
```
Add the same key to an instance template to cover a managed instance group.
Pass the `#cloud-config` as `custom_data` on the VM or scale set, for example `az vm create --custom-data user-data.yaml`.
macOS support via Homebrew is coming soon. For now, install on a Linux host using one of the methods above.
## Verify
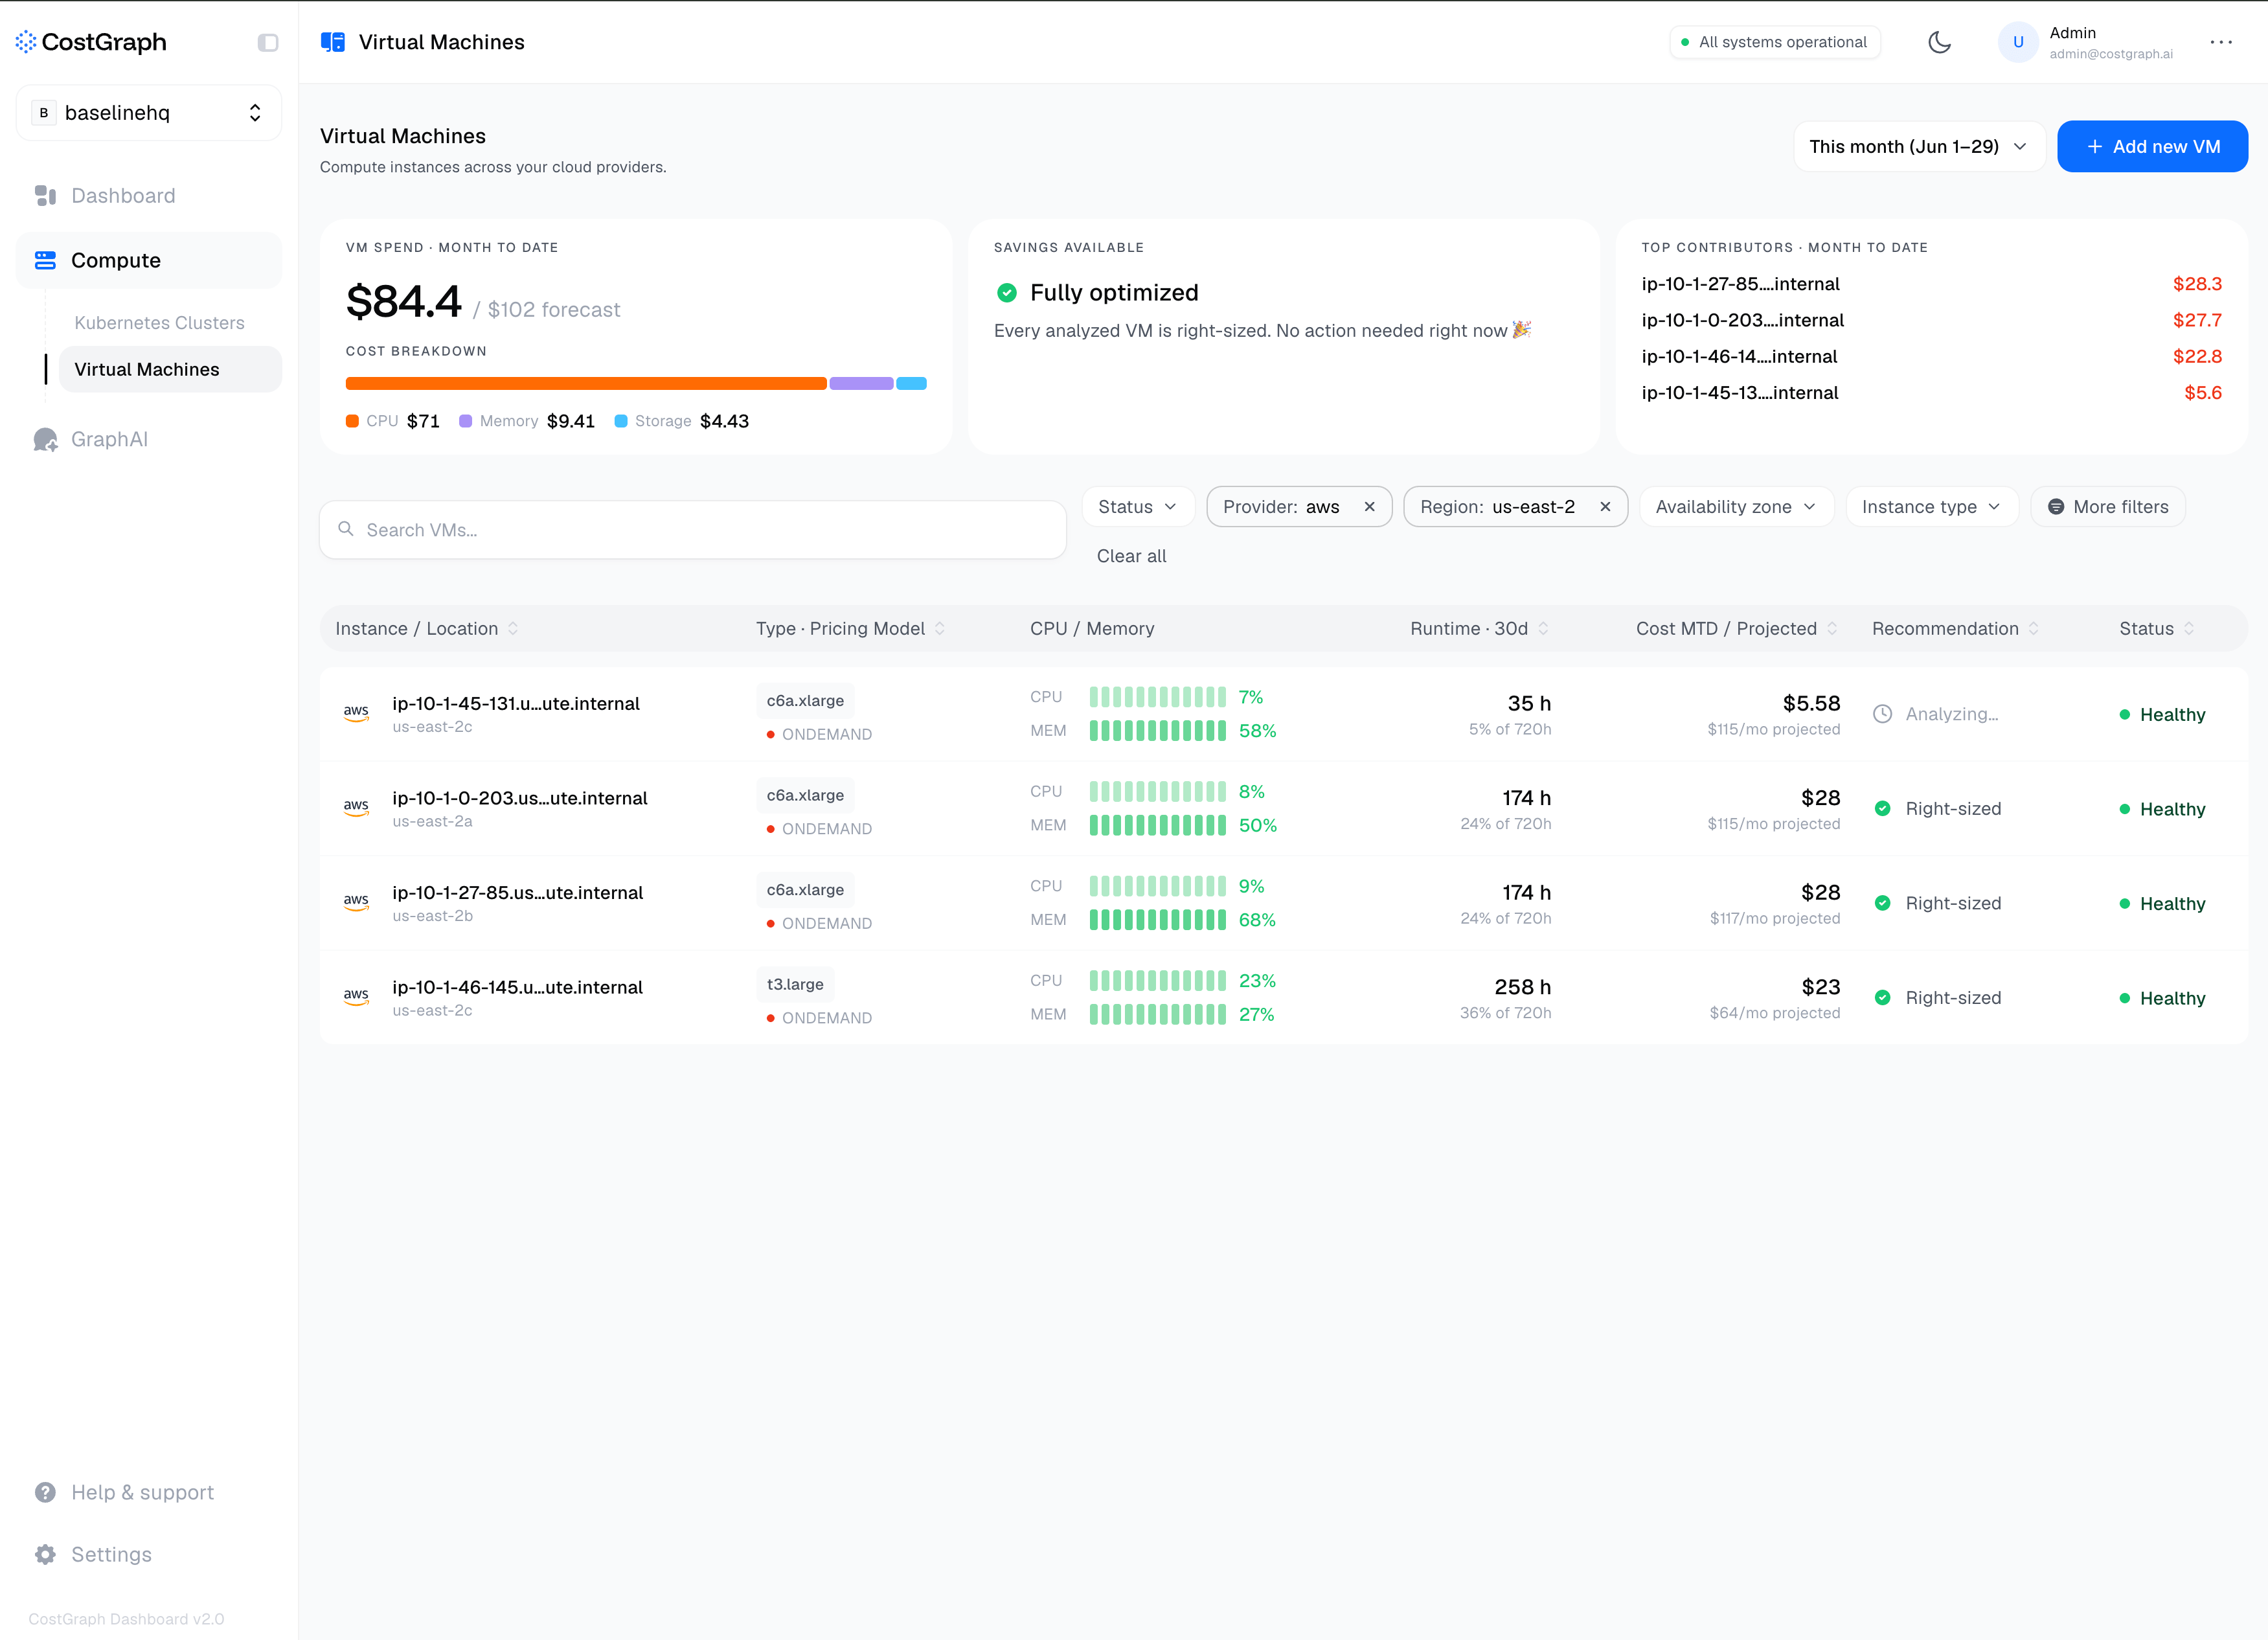
Once it's running, your host appears in the [CostGraph platform](https://app.costgraph.ai/compute/virtual-machines).
 ## Configuration
The agent is configured entirely through command-line flags and the `COSTGRAPH_API_KEY` environment variable.
```shell theme={null}
# API key via flag
costgraph-agent --api-key
# or via environment variable
export COSTGRAPH_API_KEY=
costgraph-agent
```
When you install with the script or Ansible, your API key is written to `/etc/default/costgraph-agent` and loaded by the service automatically.
API key used to authenticate with CostGraph. Can also be set with the `COSTGRAPH_API_KEY` environment variable, which takes precedence over the flag.
Port the agent exposes its own Prometheus metrics on, at `/metrics`.
Directory for durable agent state, including the on-disk remote-write queue.
Maximum number of remote-write blocks buffered in memory before they spill to the on-disk queue.
Maximum size of the on-disk remote-write queue in bytes (5 GiB) before backpressure is applied.
Log verbosity. One of `debug`, `info`, `warn`, or `error`.
Prints the agent version and exits.
### Changing flags for the managed service
The install script runs `costgraph-agent` as a systemd (or OpenRC) service with no extra flags. To change a flag for the managed service on a systemd host, add a drop-in:
```shell theme={null}
sudo systemctl edit costgraph-agent
```
```ini theme={null}
[Service]
ExecStart=
ExecStart=/usr/local/bin/costgraph-agent --state-dir /opt/var/lib/costgraph-agent
```
```shell theme={null}
sudo systemctl restart costgraph-agent
```
The first empty `ExecStart=` clears the original command so your override fully replaces it.
## Configuration
The agent is configured entirely through command-line flags and the `COSTGRAPH_API_KEY` environment variable.
```shell theme={null}
# API key via flag
costgraph-agent --api-key
# or via environment variable
export COSTGRAPH_API_KEY=
costgraph-agent
```
When you install with the script or Ansible, your API key is written to `/etc/default/costgraph-agent` and loaded by the service automatically.
API key used to authenticate with CostGraph. Can also be set with the `COSTGRAPH_API_KEY` environment variable, which takes precedence over the flag.
Port the agent exposes its own Prometheus metrics on, at `/metrics`.
Directory for durable agent state, including the on-disk remote-write queue.
Maximum number of remote-write blocks buffered in memory before they spill to the on-disk queue.
Maximum size of the on-disk remote-write queue in bytes (5 GiB) before backpressure is applied.
Log verbosity. One of `debug`, `info`, `warn`, or `error`.
Prints the agent version and exits.
### Changing flags for the managed service
The install script runs `costgraph-agent` as a systemd (or OpenRC) service with no extra flags. To change a flag for the managed service on a systemd host, add a drop-in:
```shell theme={null}
sudo systemctl edit costgraph-agent
```
```ini theme={null}
[Service]
ExecStart=
ExecStart=/usr/local/bin/costgraph-agent --state-dir /opt/var/lib/costgraph-agent
```
```shell theme={null}
sudo systemctl restart costgraph-agent
```
The first empty `ExecStart=` clears the original command so your override fully replaces it.